用户注册信息验证
本文介绍了如何实现用户注册功能,并对用户填写的信息进行验证。
设置路由
首先,在前端代码中设置路由,以便在点击注册按钮时跳转到注册页面。在 index.js 文件中创建一个名为 Register 的路由,并将其导入。
import Register from '../views/Register.vue'


const routes = [
  {
    path: "/register",
    name: "Register",
    component: Register
  },

]
创建注册页面
然后,我们需要创建一个名为 Register.vue 的页面,并在该页面中编写用户注册的代码。
在注册页面中,我们可以添加表单元素用于填写用户信息。在代码中,我们可以使用 v-model 指令将表单的值与组件的数据进行绑定。
<template>
  <div id="main-body" class="bg-primary-100 flex justify-center h-screen">
    <section class="container flex justify-center items-center rounded">
      <div class="hidden md:block">
        <img src="../assets/images/bg.png" alt="" class="rounded-l max-h-[500px]" />
      </div>
      <div
        class="rounded-r w-80 h-[500px] my-8 px-2 py-4 bg-white shadow shadow-gray-300"
      >
        <div class="text-center text-lg py-6">用户注册</div>
        <form id="register_form" class="px-4">
          <div
            class="flex justify-left items-center relative h-10 px-4 my-2 rounded border-solid border border-gray-400"
          >
            <svg
              xmlns="http://www.w3.org/2000/svg"
              class="h-6 w-6 text-gray-300 mr-2"
              fill="none"
              viewBox="0 0 24 24"
              stroke="currentColor"
              stroke-width="2"
            >
              <path
                stroke-linecap="round"
                stroke-linejoin="round"
                d="M5.121 17.804A13.937 13.937 0 0112 16c2.5 0 4.847.655 6.879 1.804M15 10a3 3 0 11-6 0 3 3 0 016 0zm6 2a9 9 0 11-18 0 9 9 0 0118 0z"
              />
            </svg>
            <input
              v-model="username"
              type="text"
              placeholder="请输入用户名"
              class="outline-0 text-sm"
            />
          </div>
          <div
            class="flex justify-left items-center relative h-10 px-4 my-2 rounded border-solid border border-gray-400"
          >
            <svg
              xmlns="http://www.w3.org/2000/svg"
              class="h-6 w-6 text-gray-300 mr-2"
              fill="none"
              viewBox="0 0 24 24"
              stroke="currentColor"
              stroke-width="2"
            >
              <path
                stroke-linecap="round"
                stroke-linejoin="round"
                d="m19 2-8.4 7.05a1 1 0 0 1-1.2 0L1 2m18 0a1 1 0 0 0-1-1H2a1 1 0 0 0-1 1m18 0v12a1 1 0 0 1-1 1H2a1 1 0 0 1-1-1V2"
              />
            </svg>
            <input
              v-model="email"
              type="text"
              placeholder="请输入邮箱"
              class="outline-0 text-sm"
            />
          </div>
          <div
            class="flex justify-left items-center relative h-10 px-4 my-2 rounded border-solid border border-gray-400"
          >
            <svg
              xmlns="http://www.w3.org/2000/svg"
              class="h-6 w-6 text-gray-300 mr-2"
              fill="none"
              viewBox="0 0 24 24"
              stroke="currentColor"
              stroke-width="2"
            >
              <path
                stroke-linecap="round"
                stroke-linejoin="round"
                d="M12 15v2m-6 4h12a2 2 0 002-2v-6a2 2 0 00-2-2H6a2 2 0 00-2 2v6a2 2 0 002 2zm10-10V7a4 4 0 00-8 0v4h8z"
              />
            </svg>
            <input
              v-model="password"
              type="password"
              placeholder="请输入密码"
              class="outline-0 text-sm"
            />
          </div>
          <div
            class="flex justify-left items-center relative h-10 px-4 my-2 rounded border-solid border border-gray-400"
          >
            <svg
              xmlns="http://www.w3.org/2000/svg"
              class="h-6 w-6 text-gray-300 mr-2"
              fill="none"
              viewBox="0 0 24 24"
              stroke="currentColor"
              stroke-width="2"
            >
              <path
                stroke-linecap="round"
                stroke-linejoin="round"
                d="M12 15v2m-6 4h12a2 2 0 002-2v-6a2 2 0 00-2-2H6a2 2 0 00-2 2v6a2 2 0 002 2zm10-10V7a4 4 0 00-8 0v4h8z"
              />
            </svg>
            <input
              v-model="re-password"
              type="password"
              placeholder="确认密码"
              class="outline-0 text-sm"
            />
          </div>
          <div class="pt-6">
            <button
              v-on:click.prevent="submitForm"
              id="login"
              class="rounded bg-green-500 w-full h-8 text-white"
            >
              注册
            </button>
          </div>
          <div class="text-center text-sm my-2">
            已有账号
            <a class="text-blue-500" href="/login">去登录</a>
          </div>
        </form>
      </div>
    </section>
  </div>
</template>

<script>

export default {
  name: "Register",

</script>
页面效果如下图所示。

添加验证逻辑
在注册函数中,我们可以验证用户填写的信息,比如判断用户名是否为空、邮箱是否符合格式要求等。这里我们介绍了一个名为 Toastify JS 的插件,它可以用于在页面上显示提示信息。
安装和使用Toastify JS
在frontend目录下,使用如下命令安装:
cnpm install --save toastify-js
首先,我们需要在页面中导入 Toastify JS 的脚本和样式。
import 'toastify-js/src/toastify.css'
import Toastify from 'toastify-js'
然后,在注册函数中添加验证逻辑,根据不同的验证结果显示不同的提示信息。
<script>
import "toastify-js/src/toastify.css";
import Toastify from "toastify-js";

export default {
  name: "Register",
  data: function () {
    return {
      username: "",
      password: "",
      password2: "",
      email: "",
    };
  },
  methods: {
    register() {
      const username = this.username;
      const email = this.email;
      const password = this.password;
      const re_password = this.re_password;
      if (username === "") {
        Toastify({
          text: "用户名不存在",
          duration: 2000,
          close: true,
          gravity: "top", // `top` or `bottom`
          position: "center", // `left`, `center` or `right`
          stopOnFocus: true, // Prevents dismissing of toast on hover
          style: {
            background: "linear-gradient(to right, #ff5f6d, #ffc371)",
          },
          onClick: function () {}, // Callback after click
        }).showToast();
      }
    },
  },
};
</script>
这段代码是一个Vue组件的脚本部分,通常与HTML模板和可选的样式一起定义Vue组件。这个特定的组件名为"Register",很可能用于用户注册功能。以下是对代码的逐行解释:
- 导入语句:
import "toastify-js/src/toastify.css";: 导入Toastify库的CSS样式,这样toast通知能够以适当的样式显示。import Toastify from "toastify-js";: 导入Toastify库,用于显示toast通知。
- 组件定义:
export default { ... }: 导出Vue组件的定义。name: "Register": 组件的名称是"Register"。
- 组件的数据对象:
data: function() { ... }: 定义组件的响应式数据。在这个组件中,数据包括username,password,password2,email,这些可能是用户在注册表单中填写的值。
- 方法定义:
methods: { ... }: 定义组件的方法。register() { ... }: 其中一个方法是register,很可能是用户点击注册按钮时触发的方法。
- 注册逻辑:
- 在
register方法内,首先从组件的数据对象中获取username,email,password,re_password的值。 - 接下来,有一个简单的验证:如果
username是空字符串,使用Toastify显示一个错误通知。这个通知会:- 显示文本"用户名不存在"。
- 显示时长为2000毫秒。
- 有关闭按钮。
- 出现在屏幕顶部中央位置。
- 在鼠标悬停时停止倒计时(即悬停时不会自动消失)。
- 有自定义的样式,特别是红色到橙色的线性渐变背景。
- 在
总体来说,这个Vue组件实现了用户注册表单的基本框架,并使用Toastify库为用户输入验证提供了用户友好的通知功能。但代码中有一些错误和不一致之处,需要修正,且注册逻辑需要更完善的验证机制。
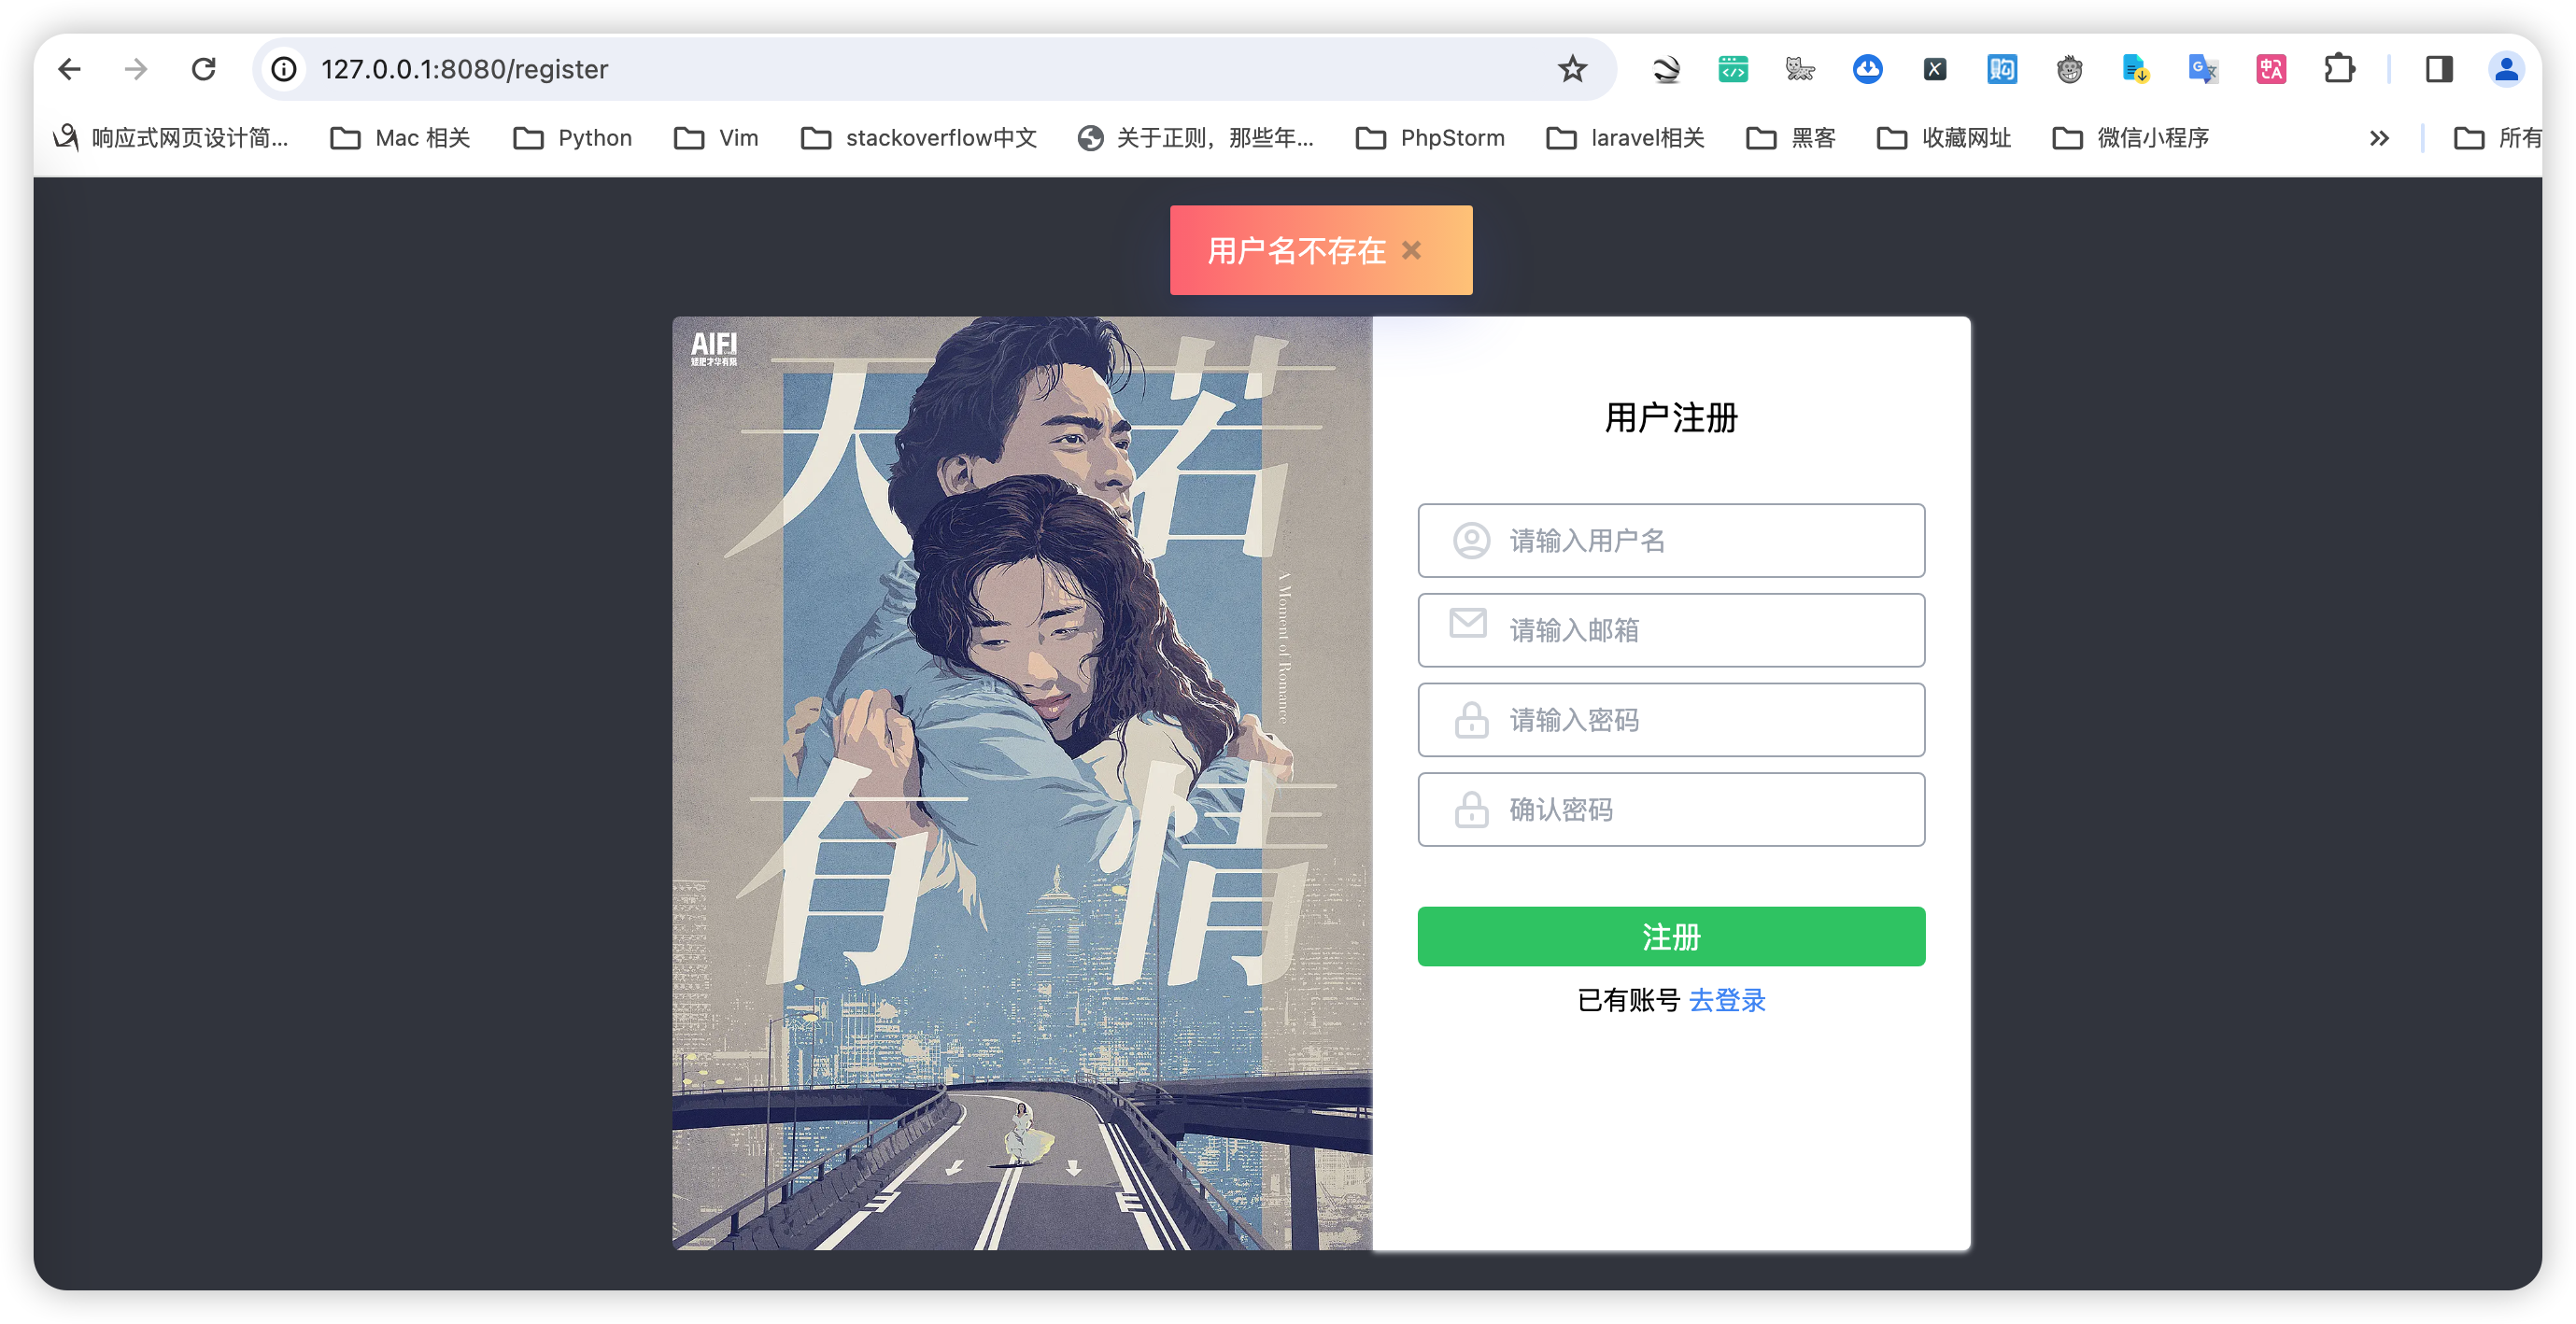
以上代码示例了当用户名为空时,会弹出一个红色提示框显示“请填写用户名”。
页面效果如下图所示。
【大熊课堂精品课程】
Python零基础入门动画课: https://www.bilibili.com/cheese/play/ss7988
Django+Vue:全栈开发: https://www.bilibili.com/cheese/play/ss8134
PyQT6开发桌面软件: https://www.bilibili.com/cheese/play/ss12314
Python办公自动化: https://www.bilibili.com/cheese/play/ss14990
Cursor AI编程+MCP:零基础实战项目课: https://www.bilibili.com/cheese/play/ss105194189
Pandas数据分析实战: https://www.bilibili.com/cheese/play/ss734522035
AI大模型+Python小白应用实战: https://www.bilibili.com/cheese/play/ss3844